
Yesterday I talked about “What is Google Authorship”. At the moment the true power of Google Authorship has yet to be revealed however there are quite a few rumours around the SEOSphere that this could be very beneficial to SEO. The reasons, as I explained yesterday, stem from the fact that there is now a boom of content on the web. This is stemming from Google’s push to encourage natural links through great content.
As with all things SEO, there were the companies who did this properly through organic content marketing creating properly structured campaigns. And there were those who scraped together small paragraphs of keyword rich text and flung this out into the web flooding the internet with chaff. Google Authorship is meant to help with this by penning verified Google+ accounts to the blogs they write for.
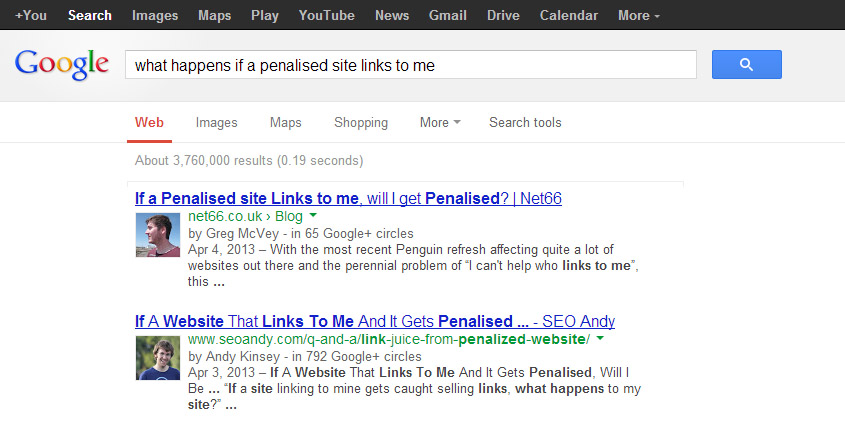
For example, if you search “What Happens if a Penalised site links to me?” You will see the following:
So how do you get this showing up on your Blog? Pay attention and you’ll have no trouble doing this by the end of this post. Follow the steps below:
> First of all, you need to sign up to Google+ and get yourself a Google Plus Profile, like this one. Ensure you have a recognisable and clear profile picture and that your profile is fully filled out.
> Ensure you actually include a line or a short author Bio in the content you’re publishing. i.e. Blog Post by Greg McVey. The name you include on the content you’re publishing has to match the name of the profile on your Google+ profile.
> Finally, make sure you have an email address that ends with the domain you’re publishing the content on. So for me I would need greg@net66.co.uk, as I’m publishing to https://netsixtysix.co.uk/ Which is what I have. Then you need use This Tool to verify that you own that address, it’ll send you a verification email and you’ll need to click a link within this email. This then adds your @domain.co.uk address to your profile, as well as a link to the domain your email address is on.
Voila! You have now verified that you are a content publisher for the domain you’ve just registered and that you want to link your Google+ profile to it. Excellent!
So how to I pen individual pieces of content?
If it’s a one off piece, you can use the following:
Blog Post by <a href=”https://plus.google.com/[enter your google+ account number]?rel=author”>[Your Name Here]</a>
However a lot of people are the sole contributors to their blog and to painstakingly go through each page individually is not productive one bit. So how can you do this sitewide? Luckily, it is a simple manner of including one link in the header of your website. If you have a static HTML website then unfortunately, as with all sitewide changes, you will have to change each HTML file individually. However, most blogs are WordPress these days anyway so for most it is a simple fix.
The code is entered after the first <head> tag and before the closing </head> tag. The code is as follows:
<link rel=”author” href=”https://plus.google.com/[enter your google+ account number]”>
Entered into your header this will associate one author with every page on your website.
And there you go. A simple guide on how to enable Google Authorship on your Blog.
Blog Post by : Greg McVey